

When shower seams need attention
Check where the shower meets a wall, floor, tub or fixture. Cracks, peeling edges, gaps and caulk pulling away from either surface leave a path for water. Discoloration that remains after cleaning also deserves a closer look. A new bead over loose caulk leaves the failing material underneath, so replacement starts with removal.
Caulk and grout serve different joints. Grout fills spaces between tiles; caulk seals joints that need to accommodate movement, including shower corners. If grout is damaged as well as caulk, replacing the caulk alone may leave part of the problem untouched.
How we prepare and seal shower joints
- We steam clean and disinfect the shower and surrounding areas.
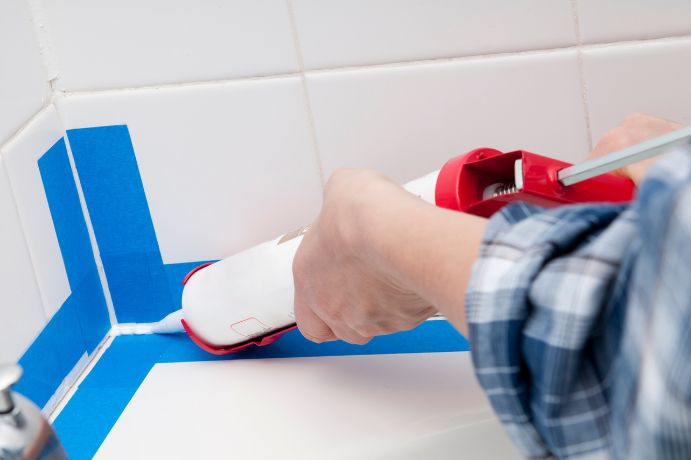
- We remove all traces of old caulk and other unnecessary particles, leaving the joint surfaces clean and dry for application.
- We apply silicone-based caulk, then use a clear sealant to waterproof our work.
- We can touch up grout if necessary.
That sequence matters whether you are comparing professional work or learning how to caulk a shower yourself. Old material, moisture and debris can interfere with adhesion. The finished bead should make continuous contact with both sides of the joint, without gaps or excess buildup. A neat line improves appearance, but a continuous seal is the reason to replace a failed one.
What professional caulking can help prevent
Removing old caulk takes care around adjacent tile and fixtures. Preparing the surfaces and applying an even bead can reduce avoidable do-overs and help limit water getting past a failed seam. Caulk is not a repair for a leak behind the wall, and no caulk eliminates every source of bathroom mold.
What affects cost and return to use
The scope changes with the length and number of joints, how much old caulk must be removed, the condition of the seams, cleaning needs and any grout touch-up. One accessible joint is different work from several deteriorated joints around an enclosure. Water that keeps appearing outside the shower, or a surface that feels soft, calls for investigation of the moisture source rather than another layer of caulk.
Removal and preparation take time before application. After sealing, keep the shower dry for the curing period in the directions for the products used. A bead can feel dry on its surface before it is ready for water, so a single number of hours is not a reliable return-to-use rule.
Shower caulking in Katy, Texas
Regular shower use and bathroom humidity in Katy make an intact seal and adequate drying between uses important. When comparing providers, look at the work included: old-caulk removal, cleaning and drying, the proposed material and whether damaged grout needs attention. We provide shower caulking in Katy, including cleaning, old-caulk removal and sealing. Visit UpFront Home Services to get in touch about worn shower seams.
The Risks of DIY Caulking
Tackling home improvement projects yourself can be a smart way to save money. However, not all DIY projects are created equal, and some, like shower caulking, can be more complex than they appear at first glance.
Caulking seems straightforward – simply apply the sealant and smooth it over. However, achieving a seamless and durable finish requires precision that’s easy to underestimate.
Suppose you slip up even slightly, whether by applying too much pressure or missing a spot, the entire caulking job can end up compromised. That can lead to an aesthetically unpleasing result and functional issues. Some of the many challenges you’ll face when attempting shower caulking on your own are:
- Achieving a clean finish – The final result depends on the application and surface preparation. Any lingering moisture or small particles can prevent the caulk from adhering correctly, leaving gaps where water gathers.
- Selecting the correct type of caulk – The bathroom’s wet-dry environment demands a product that can withstand constant fluctuations in humidity and temperature. Use the wrong kind, and you’re looking at premature peeling or cracking, necessitating a do-over sooner than you’d like.
- Causing further damage – If you’re not careful, you might damage the surrounding tiles or fixtures, turning what was supposed to be a simple project into a disaster.
- Color matching – Finding a caulk that blends seamlessly with your existing setup or other bathroom features can be tricky, leaving you with a mismatched look if not done correctly.
The Value of Professional Shower Caulking Services
Investing more upfront for professional caulking services pays off repeatedly over time. It’s a form of protection for your bathroom that maintains its functionality and appearance. Professional shower caulking adds value to your home in several key ways, from preventing potential water damage to improving the look of your bathroom.
Preventing Expensive Repairs
As harmless as water seems, it is one of the biggest threats to your home’s integrity. Caulking around your shower protects against water seeping into places it shouldn’t. Old or poorly applied caulk can fail, allowing water to penetrate walls and floors. That causes water damage and structural issues, which are expensive to repair.
Professionals will apply the caulking correctly, sealing every nook and cranny. They know the right materials and the most effective techniques, which can significantly reduce the risk of water damage.
Health Benefits
Moist environments like bathrooms are perfect for mold and mildew to grow. Dark streaks of mold and mildew are unsightly and pose serious health risks, especially for people with breathing problems. Professional shower caulking can prevent the growth of these harmful organisms by eliminating the damp conditions they need to thrive. A well-sealed shower means a healthier living environment and no mold growth.
Aesthetic and Resale Value
A well-maintained bathroom is pleasant to use and adds to the overall aesthetic appeal of your home. Cracked or discolored caulk around the shower can detract from your bathroom’s appearance, making it seem older and less cared for than it is.
By having professionals handle your caulking needs, you maintain the pristine appearance of your bathroom, which can contribute to your home’s resale value.